At 14,508 feet Mt. Whitney is known as the highest point in the lower 48! This also makes it one of those hikes that everyone will ask if you whether you’ve done it or not. On August 2nd I finally checked off this trail from bucket list. I’ve been wanting to hike this trail for some time now, but as I learned more about the outdoors I discovered that there is a lot to take into consideration before embarking on this journey. Together with my friends, Christina and Dillon, we made it to and from Mt. Whitney’s summit in three days. Below is my photo diary account of the 21 miles plus 6,000ft climb.

Getting Permits

Permits are required to ascend Mt. Whitney for both day and overnight hikes. To reserve permit you’ll need to enter a lottery and have potential dates in mind. I entered the permit lottery in early February with plans to enter during a weekday in August.
A random weekday in August seemed to be the best chance to win permit reservations and avoid crowds. August also appeared to have more favorable weather conditions, however despite the summer season we still ran into snow patches.

We picked up our permits and WAG bags at the Eastern Sierra InterAgency Visitor Center. WAG bags are essentially the human equivalent of what dog owners pick up and carry their dogs’ messes in. Yes, you have to carry out your #2. Don’t be that person that leaves poop bags on the trail.
The Hike
Day 1 – Alabama Hills

We loaded up our 2016 Hyundai Tucson and left Los Angeles in the early afternoon on Monday. The plan was to spend a day at good ole’ Alabama Hills to start acclimating to the elevation change. Mt. Whitney is notorious for giving hikers the entire spectrum of altitude sickness. To lower our chances of getting sick we gave ourselves an extra day to relax, to get a full night of rest, and then be ready to start our ascent the following morning.
For the 3-hour drive the nice folks over at DriveShop provided us with the Tucson. I’ve visited Alabama Hills multiple times in the past and by far this car provided us with the most smooth ride. To find a spot to free camp you have to drive around the rock formations on unpaved ground. The Tuscon is significantly higher than any of the previous cars I’ve taken and handled all the bumps and loose rocks. My friends and I didn’t shake like crazy whenever the car rolled over uneven ground.

The Tucson was able to fit 3 adults and all our gear comfortably with even room to spare. Fitting everything and everyone into one vehicle was important for efficiency reasons. Whitney Portal Road, the only road that goes up to the trailhead, is undergoing a lot of construction. This results in hours of delay and less parking (normally hikers park their cars overnight along the road.) Luckily overnight permits include a parking pass for 1 car per group valid for the lot next to the trailhead. If my friends and I each drove our small sedans instead of carpooling we’d be forced to deal with where to leave the additional car(s) overnight, with shuttling one another and potentially delaying with construction traffic.
For updates on road construction check out: fs.usda.gov/detailfull/inyo/home/?cid=stelprd3853181&width=full

We setup camp between few rocks that would provide coverage from any gusts of wind and got ready for bed around 7pm under a magnificnet purple sky. The purple sky and Milky Way photo is the result of a combination of a new moon, sunset, lots of dust (and pollution) and luck.

Day 2 – Whitney Portal to Trail Camp

The following morning we woke up around 5:00am and got ready to start our long hike up. The journey begins with a 30-45 mins drive up Whitney Portal Road. The drive itself isn’t that long distance wise, roughly 12 miles. However with ongoing construction delays up to 3 hours can happen. My group and I avoided potential traffic with our early departure. 
After driving to the end of Whitney Portal Road we parked by the picnic area to cook breakfast and use the last official toilet. We each wolfed down a Mountain House packet for breakfast and decided how to distribute the weight among our packs. There’s even a scale at the start of the trail if you want to be exact about weight. Also as a convenience to park rangers we tied our permits on a visible area outside of our backpacks. This way if we were spotted by any authority figures it would be clear that we were allowed to be in the area. Some people try to go into the wilderness area without a permit, but that’s illegal and reinforced by rangers who will escort you off the mountain and give you a hefty fine.

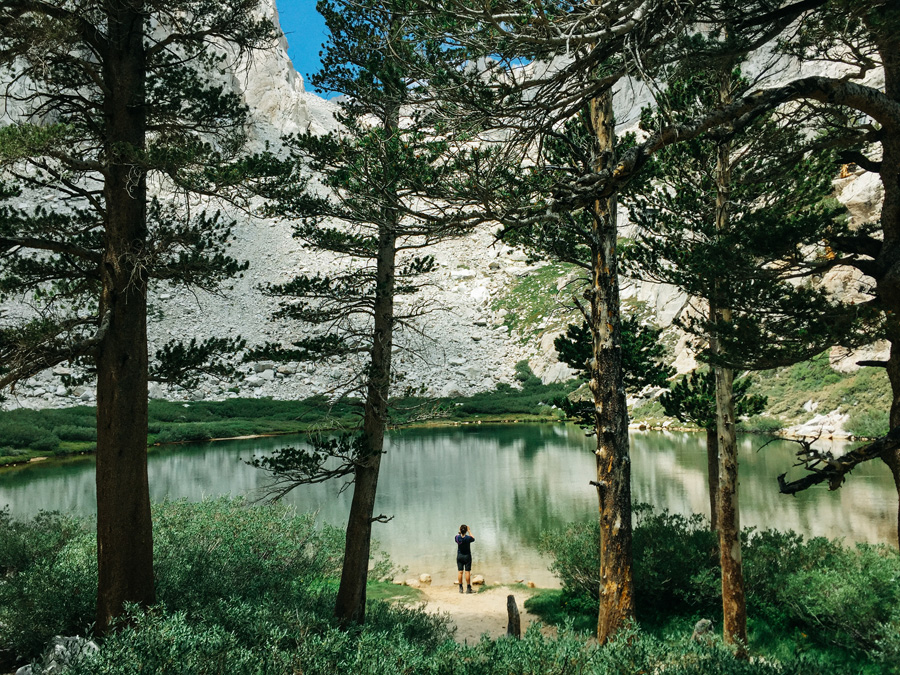
Among the three of us we divided the shared essentials to split weight. Christina had the tent, I had the bear can filled with food, and Dillon carried the kitchen. We each individually carried our own personal items such as a sleeping bag, sleeping pad, water bladders, etc. The trail itself was quite lovely. We crossed a couple of rivers, cut through dense trees and paralleled vibrantly, green meadows. During this time I was especially appreciative of the trees because during the middle of the day temperatures were hot! Ironically we would later encounter snow while on trail.


Despite California being in a drought we had plenty of water sources to refill our bottles. Thanks to its elevation Mount Whitney always has plenty of snow that continuously melts into the lakes and streams. We pumped water through a Katadyn Hiker Pro Water Filter, which conveniently screwed on top of both my Osprey Hydration Pack and my friend’s traditional 1L Nalgene bottle. Water straight from the source tastes a lot better than Los Angeles tap water.
A quick review on this filter: It’s awesome! It works well! It’s convenient! It will also make your hands very tired from pumping water for the group. I prefer the gravity filters more for more efficiency like the Platypus GravityWorks.

Sadly one bad thing about the hike is all the abandoned WAG bags! On the way up we came across several WAG bags left in plain sight. This is terrible, please don’t do this. Not only is it considered littering, but it’s also disrespectfully gross! Essentially this is the human equivalent of walking your dog onto a neighbor’s yard, letting him defecate, and then expecting someone else to pick the mess. Don’t be that person.


We arrived at Trail Camp before the sun began to set. This gave us plenty of time to complete all of our camping chores: setting up the tent, refilling our water supply, cooking, cleaning, personal hygiene and gear maintenance. As I mentioned earlier the trail up from Whitney Portal is quite popular. The photo above clearly shows the amount of neighbors we had despite hiking up on a random Tuesday in August. Graciously the hiking community is an amicable one. When the sun went down everyone at camp was respectful of quiet hours, most upheld the Leave No Trace Principles (still thinking of that WAG bag on trail), and more importantly everyone was friendly.

For a simple over night we packed freeze-dried meals for ease. You just add boiling water into the packaging then wait for the food to rehydrated. Hot meals have a way of always hitting the right spot after a long day of travel. It’s well deserved. Unfortunately a few of our neighbors had to deal with prolonged empty stomachs when they returned to Trail Camp from the summit. There’s a reason why bear cans are required for this hike: forget the bears –the marmots are skilled ninja thieves. They move quietly among the rocks and have the blind courage of a chihuahua. Keep your food stored and locked away in the bear can at all times when unsupervised. Otherwise the marmots will terrorize your camp; chew through any backpack, tent, or packaging; and will unapologetically leave you hangry.


Bedtime was at 7pm. Again an early bed time to go with an early start in the following morning. Since the skies were clear and the forecast looked promising we slept with the rain fly rolled up to literally sleep under the stars. I had to used the bathroom in the middle of the night and woke up the hands down the best stars I’ve seen in the Sierra Nevada. Usually my star-gazing attempts are thwarted by clouds, this was a very lucky night.


Day 3 – 99 Switchbacks + Summit

Everyone, including our neighbors, was up before the sun. We packed our bags with essentials and left heavier items like the tent and bear can back at camp. Our summit day would consist of taking Mt. Whitney’s infamous 99 switchbacks to the summit and then down back to the car. If you’re in good shape going up the switchbacks isn’t too bad. However for descending I highly recommend taking rest steps while moving and perhaps switching to more padded socks. Coming back down is very hard on the knees. Your feet will be aching from the pounding on the hard rocks.


The views going up the switchbacks are for the most part nothing but repetitive rocks and more switchbacks. Once we hiked above 13,000ft magic happened and the views looking down were amazing. There was so much depth! Multiple mountain ranges, valleys, lakes, and anything else that depicts the scale of how immense the world is.


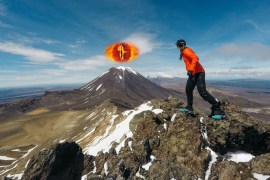
I also like standing on top of high points.


You know all your work has finally paid off when you see the Summit Hut. We reached the top in a few hours and took time to stroll around the top of continental United States. This included taking photos of ourselves staring off into the distance, shoe selfies, and asking a stranger to take a group of the three of us together blinking simultaneously –that takes some real skill.


It felt amazing to be standing at the top of the lower 48 because this was a feat that I couldn’t imagine myself doing years ago. There’s a nice pat on the back feeling you’d get when you’ve personally knocked out 21 miles and 6,000ft of climbing.

Final Thoughts

We returned to our Tuscon a little after sundown and being able to sit in its seats was amazing. In comparison the hike back down to the car was more intense than the hike up. While hiking down our feet and knees took a constant beating from the hard rock surfaces. Personally it’s more mentally challenging hiking out while being able to see where you’ve parked your car –miles away. Although I enjoyed the views climbing up to Mt. Whitney, the views coming down weren’t as magnificent. Primarily it looks like endless switchbacks and a tiny car that never seems to get any closer.
Nevertheless hiking to the summit with preparation and the right group of friends will make the hike one for the books. I can’t forget what it was like to sleep under the stars at the highest point in continental United States. You feel quite small, humble, and just happy to be able to take personal challenges such as climbing up Mt. Whitney.
What’s in My Backpack

To anyone with plans of hiking to the top of Mount Whitney in the future I’ll end this post with a breakdown of all the gear that helped me summit. If this seems like a lot you can save weight by leaving all the camera equipment behind.
Essentials
- Backpack – For about a year and half now I’ve used the Gregory Deva 70L (there’s also a mens version available) for all my multi-day hikes. This bag had held up through the hot desert of White Sands National Monument to the winters in Yosemite. The hip belt and frame provide me with enough support to comfortably walk for days carrying weight. — I should mention that I’m using the word “comfortably” very loosely. With any backpacking trip you’ll feel the weight weigh down on your no matter what, you’d just want to avoid injuring and over-exerting yourself.
- Tent – As always I took my Kelty TN2 along with a few MSR Snow Stakes. Since the ground at Trail Camp on Mt. Whitney is solid rock I used filled the snow anchors with rocks in order to pin the tent down and prevent it from flying away.
- Bear Can – Bear Cans are used to store food whenever you’re not using or consuming it. They’re designed to roll around in the event a bear or devious ninja-marmots of Mt. Whitney try to steal your food. Almost all overnight permitted hikes will require you to carry one.
- Hiking Poles – I prefer to hike with my Cascade Carbon Fiber Trekking Poles because they allow me to move more efficiently and in the long run they will also prevent my knees from wearing down quickly. This means I’ll still be able to explore and adventure outside when I’m a senior citizen!
- Compass, Map + GPS – For navigational purposes,of course.
- Shovel, Toilet Paper (TP), + Baby Wipes – When nature calls, dig a 6-inch deep cat hole and handle your business.
- First Aid Kit – Just in case anything ever happens.
Sleeping
- Sleeping Bag – I took my Kelty Cosmic Down 0 Degree bag. I’m the type of person who tends to sleep cold, so a warmer bag is perfect for me! However, during this trip to Mt. Whitney I could have gotten away with a 30° degree bag. I ended up sleeping in the bag with the zipper open.
- Sleeping Bag Liner – I use a sleeping bag liner to create a barrier between myself and the actual sleeping bag. This is especially useful if you’re using a down sleeping bag. The oils and sweat from our bodies will get into the bag’s feathers, which will cause the bag to lose loft. Granted you can just go get your sleeping bag professionally washed, but a liner will help keep your bag cleaner between washes.
- Sleeping Pad – Once upon a time I went camping without a sleeping pad… never again will that happen! A sleeping pad serves a comfy mattress, keeps the cold from ground from entertaining your body, and in my sleeping pad’s case it reflects the heat from my sleeping bag back into itself. Recently I upgraded from a REI Airrail 1.5 to a Therm-A-Rest Xtherm sleeping pad. It’s lighter, packs roughly into the size of a water bottle, and ultimately keeps me warm.
Clothes
- Top Base Layers – Anticipating wind as I climbed higher I wanted to wear a base layer that was very breathable and would provide some coverage. I wore the Outdoor Research Echo Hoody as my main hiking shirt.
- Top Bottoms Layers – On this trip I finally gave in and picked up a pair of hiking pants that can be unzipped at the knees to become shorts. Sure, like everyone else I thought they looked silly however there’s a time and place for everything and the Outdoor Research Women’s Ferrosi Convertible Pants were perfect for this hike. The weather on the way up to Trail Camp was quite warm, but up towards the summit the weather turned windy and chilly. Convertible pants provided optimum flexibility with comfort.
- Sleeping Clothes – Yes, a light set of pajamas are a must. I prefer not to sleep in dirty clothes.
- Underwear – I’m packing 3 sports bras and 4 pairs of antimicrobial underwear by ExOfficio.
- Warming Layers – Doing the Whitney Trail in the summer meant that my Thermoball down jacket by The North Face would be enough to keep me warm at night. No additional fleece was needed.
- Outer Shell – My Marmot Precip Raincoat was worn to block the wind at the summit.
- Sun Protection – Sunglasses and plenty of sunblock.
Footwear
- Socks – For the entire hike I wore a pair of Smartwool PhD socks. They’re made with merino wool, which dries quickly and doesn’t get stinky!
- Shoes – I saw a number of people hiking up and down in trail runners, however it’s my preference to wear a full boot like my trusty Salomon Quest 4D GTX. When you’re hiking up and down on hard rock extra support and cushion on your feet is greatly appreciated at the end of the day.
Electronics
- Camera – + Memory Cards
- Power – Anker 20000 mAh, 20,000 mAh is more than enough power for myself and for my friends’ electronics.
- Tripod – MeFOTO Carbon Fiber Road Trip Tripod
- Lighting – Black Diamond ReVolt Rechargeable Headlamp,
Cooking
- Kitchen – MSR PocketRocket Stove + 1.6L MSR Apline Stowaway Pot + Lighter + Disposable Eating Utensils (courtesy of Chipotle)
- Water – Katadyn Hiker Pro Water Filter + Osprey Hydration Pack
- Tools – Gerber Multitool
- Navigation – Compass, offline downloadable maps, in addition to physical maps.
SUPPORT THE BLOG
The 2016 Hyundai Tucson featured in this post was provided by DriveShop
If you find content like this helpful or enjoyable, please consider purchasing gear from B&H or any of my other my affiliate links. Anything you purchase after clicking through these links helps keep the lights on for the blog –and you get to treat yourself to a new toy!


It’s great to find an expert who can exialpn things so well