Continuing my exploration of the world after chasing the aurora borealis in Alaska I flew back to LA then hopped into a car and headed up to Yosemite to attempt the Half Dome hike. My adventure seeking pals and I ended up making it to the top!
Inspiration
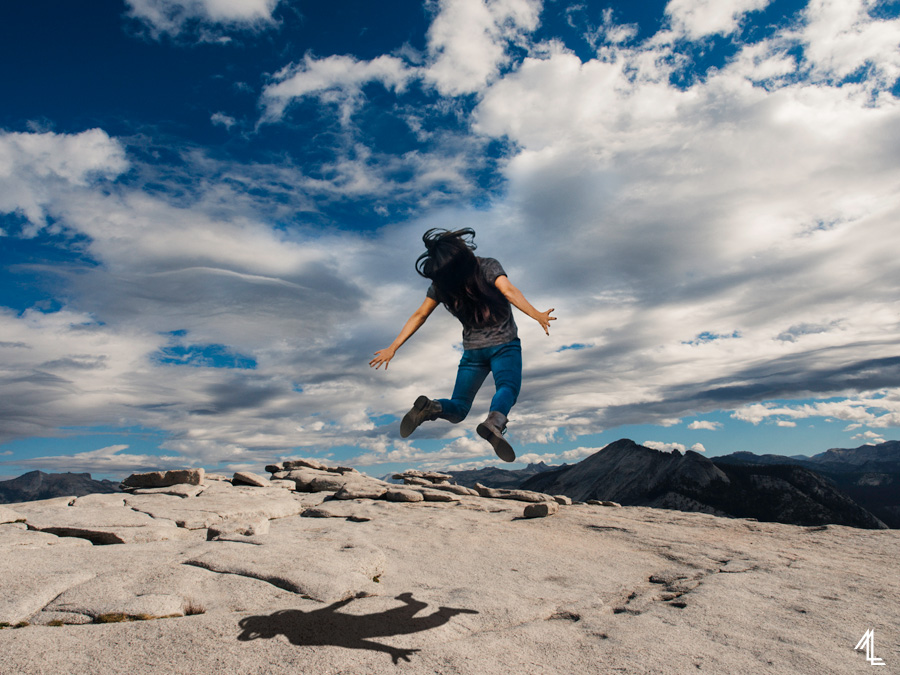
I’ve always been fascinated with the idea of flying [Off the Ground.] There’s something so freeing about the idea of fighting the one force that constantly holds everyone down –gravity. And when you’re 8,800 ft above the ground on the iconic granite Half Dome why not seize the opportunity to make a jumping shot. Up, up, and away I go!
There are no limits once you’ve taken off.
Execution
Truth be told I didn’t jump off Half Dome’s peak. Considering that the hike has roughly 300 accidents per year, has taken 6 lives since 1995, and during my hike there were 50mph winds blowing… Yes I’d like to keep my life please, thank you. Thus after a 8.2 mile climb to the top I photographed a few wide-angle plates to be my jumping background with Olympus’ OM-D E-M1 @ 12mm. I chose to bring this camera over my D800 on this hike due to weight factors. When you’re making a 17-18mi roundtrip hike with a 4,800 ft elevation gain you want to be as light as possible.

Later I photographed myself jumping off an apple box. This also gave me the opportunity to change my clothes. When I imagined lift off from a mountain I’d rather see casual clothes over hiking gear.

Whenever I’m photographing a jump there’s a few elements that I’m looking for. The primary one being a sense of compulsion as if the jumper was being drawn into the sky from a force stronger than gravity. In this situation this meant jumping with my torso up, open hands, and pointed toes. To get the perfect jump locked my Nikon D800 with a 50/1.4 on a tripod and triggered it wirelessly with a pair of Pocketwizards.

The tricky part comes in post processing. It’s absolutely crucial to be very precise when masking yourself out of the jumping plate. Any excess “outline” will give away the illusion.

Once you’ve “cut” yourself out of the jumping plate you can’t just drag and drop yourself onto the Half Dome background. There’s needs to be a shadow below that matches the shadows in the environment.
To create my new shadow I used a Drop Shadow Layer Style on myself, then separated the Drop Shadow into its own layer.
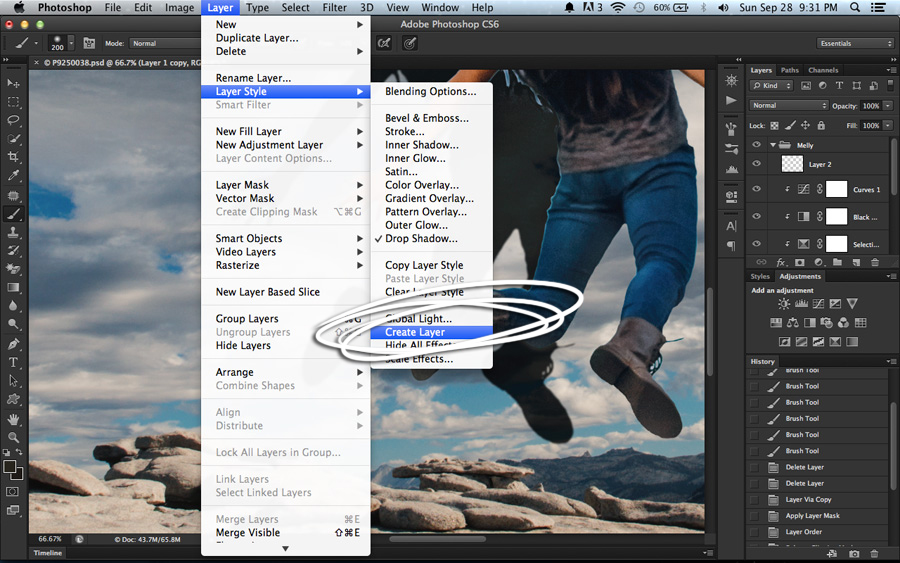
By separating the Drop Shadow into its own layer you’ll be able to make individual changes directly to the shadow. 
It takes a bit of time to get the shadow to fall just right. I moved and resized it around using the Edit > Transform > Perspective. Then turn the Shadow layer into a Smart Object with a slight Gaussian Blur.

Equipment Used:
OM-D E-M1 Mirrorless Mro Four Thirds Digital Camera
M. Zuiko Digital ED 12-40mm f/2.8 PRO Lens
Induro Alloy 8M AT214 Tripod
Nikon D800
Sigma 50mm 1.4 (Nikon/Canon)
Pocketwizard N10-ACC-1 Remote Camera Cable (1′)
Pocketwizard Plus III Transceiver
Apple Box
More on Project 52:
Why I’m taking the challenge: blog.mellylee.com/2014/09/52-week-challenge
Week 6: blog.mellylee.com/2014/09/652-never-give-good-luck-will-find
Week 7: blog.mellylee.com/2014/09/752-garden-state
Week 8: blog.mellylee.com/2014/09/852-going-back-to-nature


I love that you’re doing this challenge and your posts are always on point! Big ups on the youtube channel, you should post more videos!